I just released three new crochet bag patterns It took me forever to actually write the patterns and publish them. I am a naughty designer. The common theme between all three is the use of leather handles on all of them. Just click on the image…
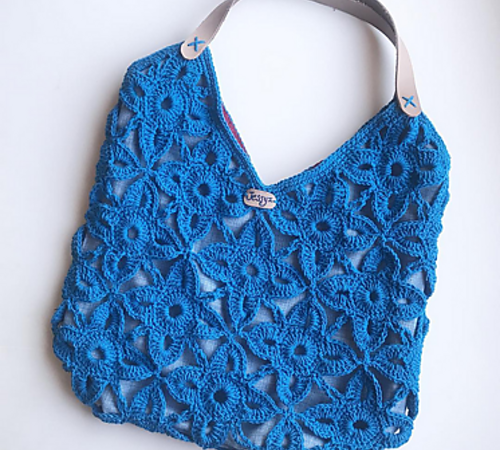
I just released three new crochet bag patterns It took me forever to actually write the patterns and publish them. I am a naughty designer. The common theme between all three is the use of leather handles on all of them. Just click on the image…
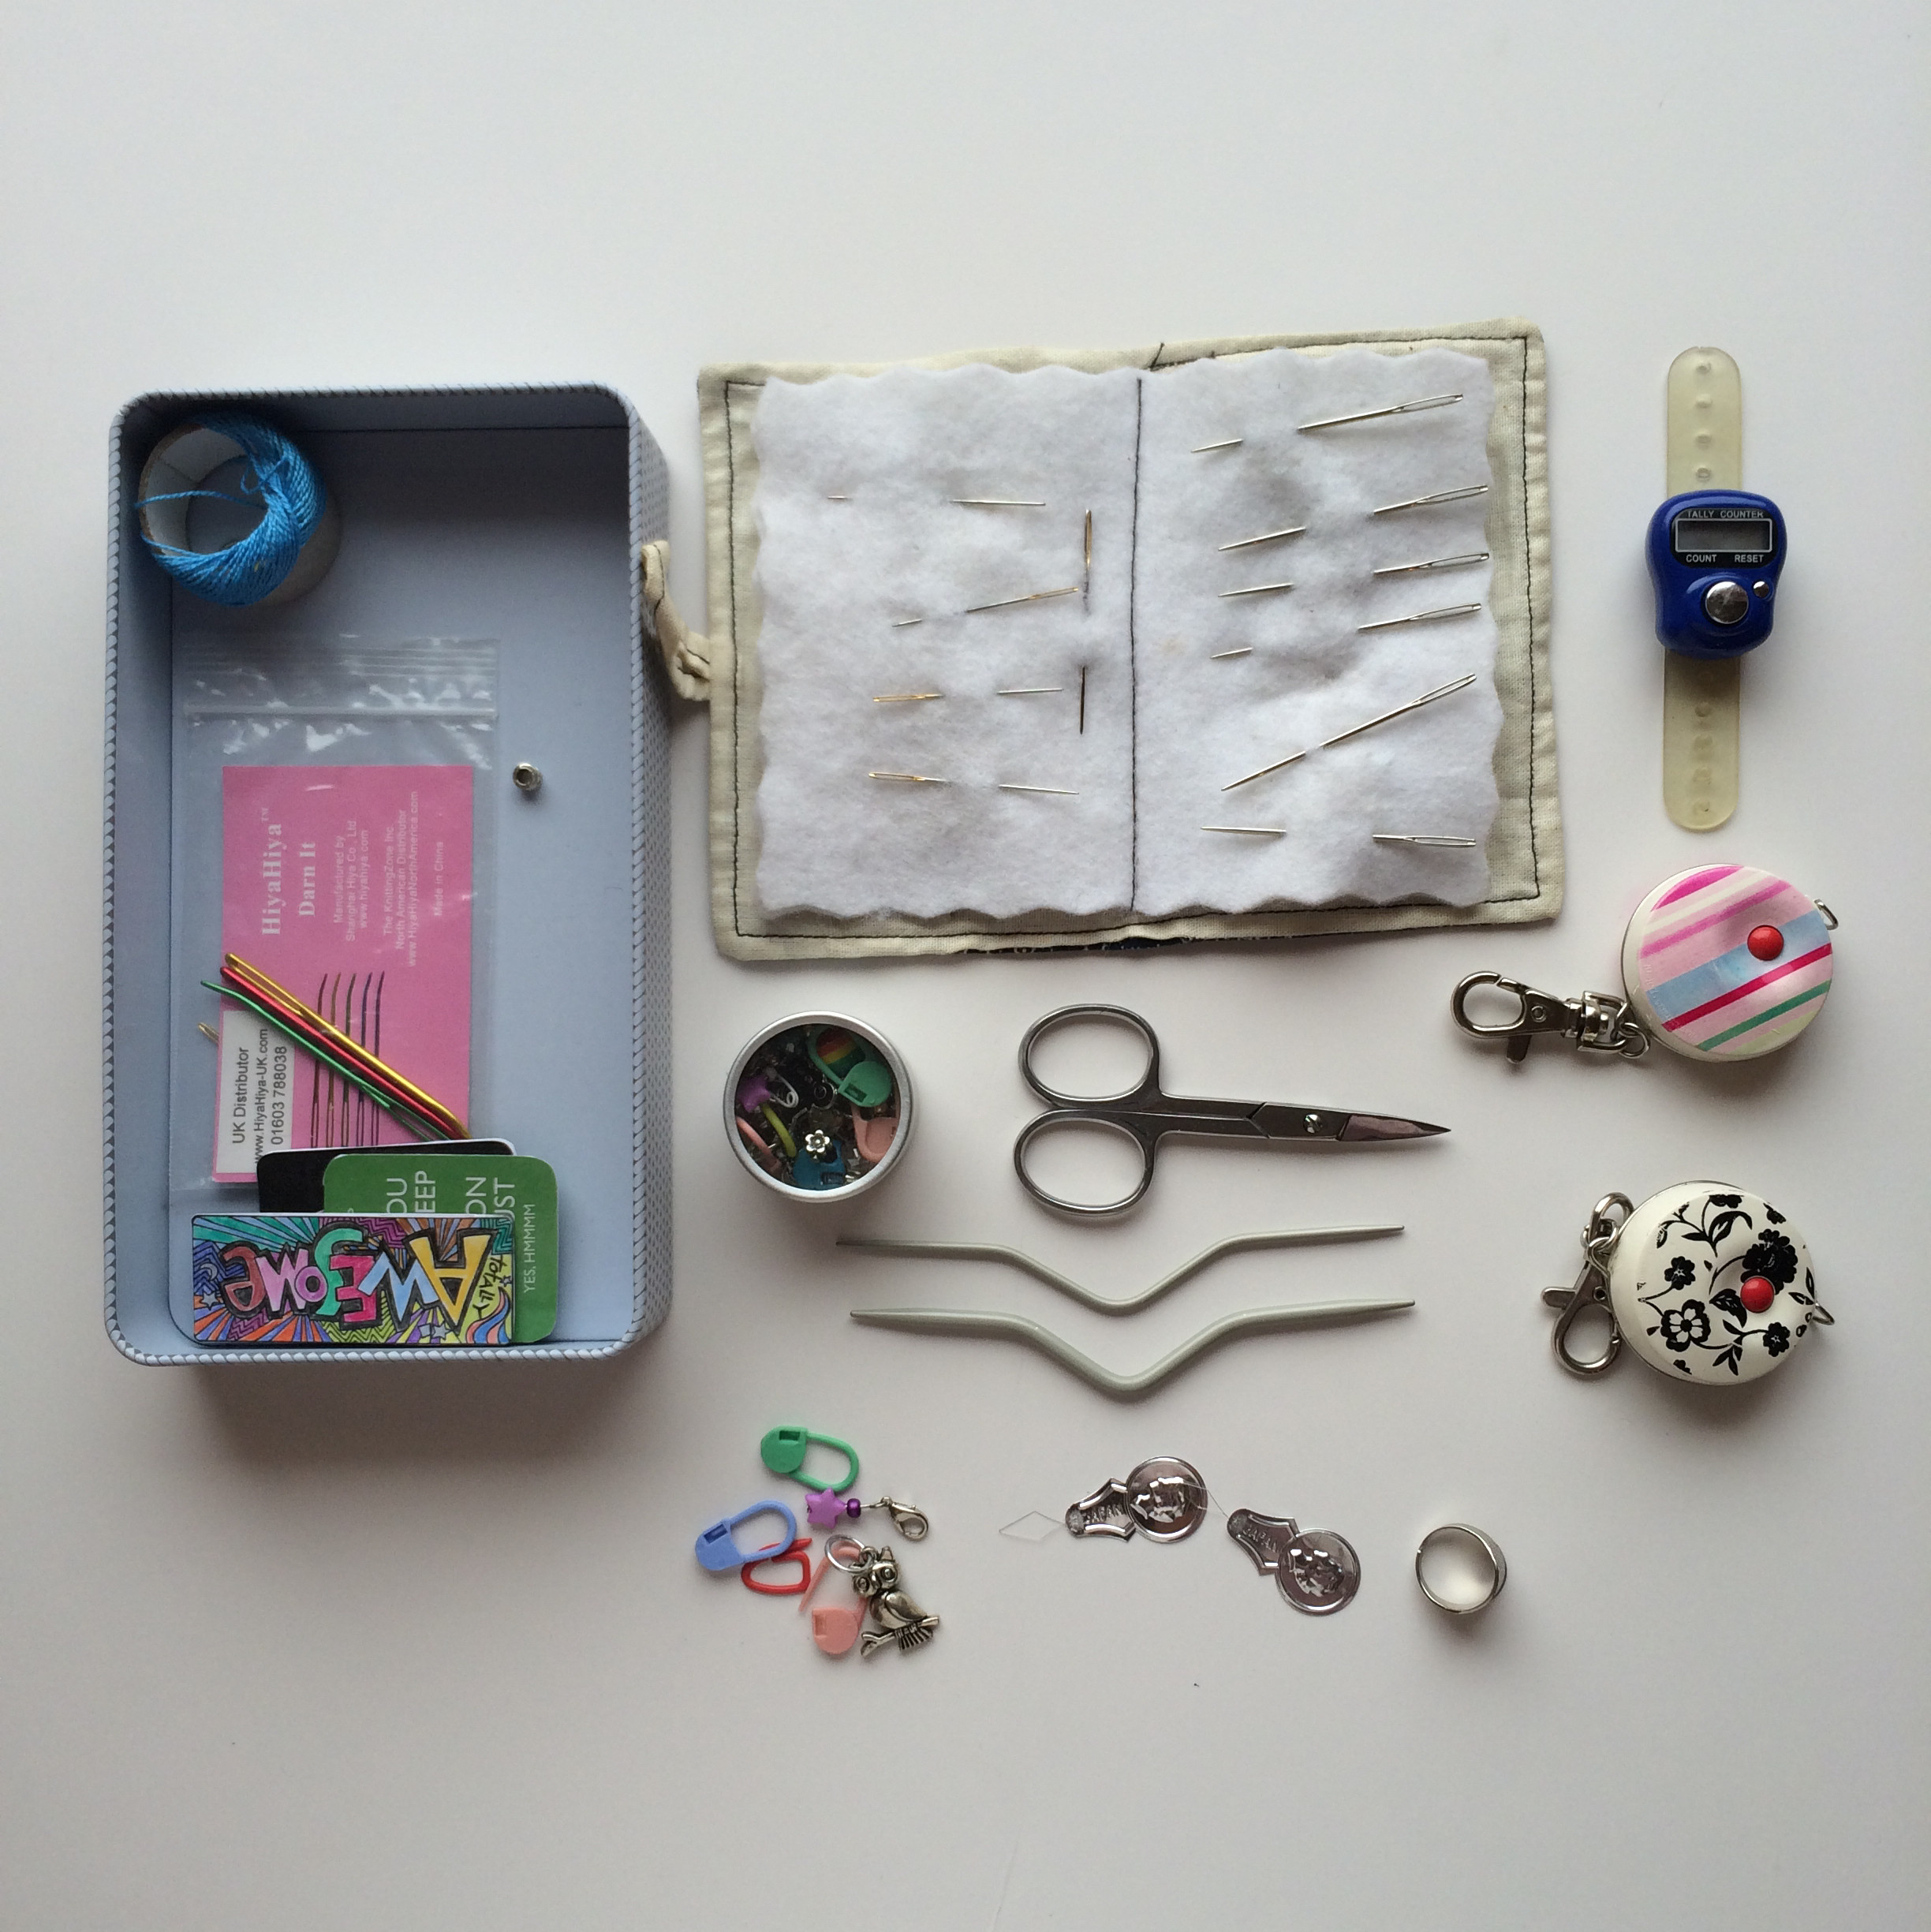
What is in your knitting notions kit? I keep all of my notions in a big tin, because I love them and it is easier to access whatever you need compared to a zippered case. I have a needle book where I keep most of the…
Last year I did a review on my year. One of the nice things about blogging is that you can go back and see what it was like a specific point in time. I had no resolutions last year, but I had two personal goals,…
This started last week as a bunch of cotton skeins of yarn. And then they became a bunch if squares. Which became a blanket. Of course there were leftovers. And I have a problem with leftover yarn. So a baby beanie was made too. As for…
It has been ages since I have released a pattern. This one is dear to my heart and has been in the making since February. The doll itself is a simple one. If you can crochet, increase and decrease in the round you can definitely make…
I keep forgetting to blog. It has been a while. I am a bad blogger. Sorry, can I make it up to you with some pretty pictures? After the crazy week of rainbow knitting and crocheting I wanted to knit socks so I cast on Jaywalkers.…
This is my Uncoordinated blanket. I started it on July the 28th of 2012. I was just stash busting, trying to use up old odds and ends of leftover Alize Diva that were the remains of projects. I then called it the vulnerability blanket, but today…